We have gotten a few requests on how to make our tent weights.
How I got here (not requred reading):
During our first year on the road I studied lots of weights.
The tent comes with nails and a base plate. If you nail the tent into the ground how do you get the nails back out? I have the best luck repeatedly pulling up on the leg till the nail comes out. Sounds just like what the wind does :)
I have used the base plates with 60 pounds of gravel in a 5 gal. bucket. The only problem is if you watch the tent in the wind, the legs keep jerking back and forth and the plates will slide out from under the weights.
Then there are those weights that hang from the top of the tent corners. If you have ever watched the tent in the wind the top moves around quite a bit. If that movement happens to be near the resonate frequency of the hanging weights all will soon be lost. Even if that is not the case the location of the weight related to the foot print of the tent shifts as the tent leans. Given enough movement this will actually help tip the tent over. If the weights are strapped to the leg so they can't swing I think these two problems should be solved.
A strong firm connection at the bottom of the pole is what is needed. Something that is dense and easy to handle was also important. Lastly I needed a better base for our display poles, because the wooden X took up too much room in the truck.
This is my solution that some of you have watched during a storm.
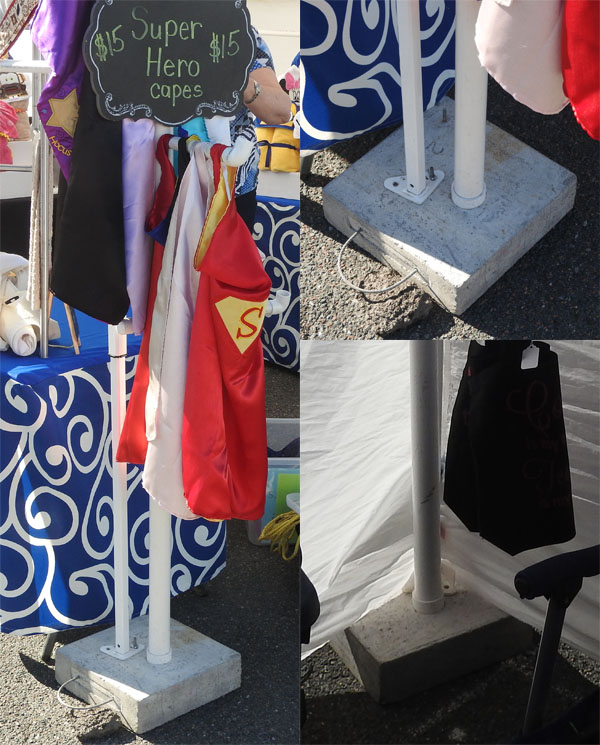 |
Overview: On the left is the front left weight with our cape display pole installed. In the upper right you can see the tent screwed down to the weight using a wing nut. In the backgroud is the corner bolt in case we are working in a restricted space. There is a number 2 on the base of the pole hidden by the pole itself that matchs the number of the weight. Plan ahead for those hot days when you can't think. In the bottom right you can see how we store the display poles in the rear weights at night or when it rains. |
|
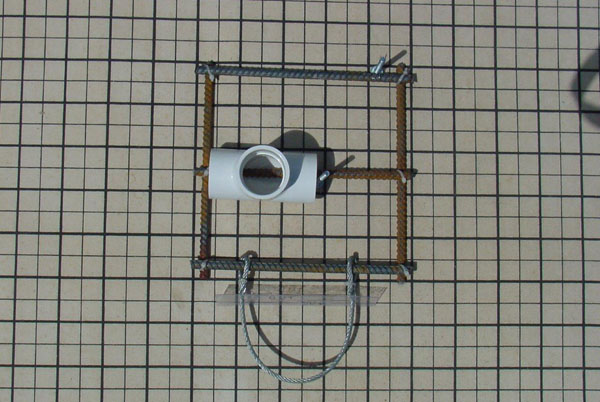 |
Details: So here are the pictures I took to help me if I needed to make more. The pictures were taken on a one inch grid. I have two bolts. One is in the center for locations that are bigger than the tent. The other is near the corner for those 10x10 spaces where we can’t overhang into the next space. |
|
|
|
The clear plastic shield on the handle is used to plug the long slot in the form where the handle passes through. Don't forget to make that slot :) The shield has a cut between the two holes so you can remove it after the weight is removed from the form and is reused for all 4 weights. Sorry the shadow from the plastic shield makes it hard to make out the details. The real plastic has the word OUT on it twice to remind me which side faces out for a better seal. |
|
|
|
I put the rebar together with tie wraps. Be sure to use longer ones if you make a thicker weight or adjust the rebar placement.
|
|
|
|
The forms are 12x12x4 with some 1/2 inch plywood for the bottom all screwed together. I used one half bag of cement per weight. They weigh 40 lbs. If you go for 5 inches and come within 1/4 of the top you should be at 50 lbs. etc. 50 lbs is required in some cities. Not a bad idea. Notice the wire passing through the form (top to bottom in pic), that holds the rebar in the middle of the form. After about 25 minutes I pulled those out of the form. |
|
|
|
I cured the weights in the form for at least 18 hours. Cover to keep moist. The trick is you must never run out of moisture those first 5 days. In summary this is a week long job but worth it. Good luck. Email us if you have questins. |
|